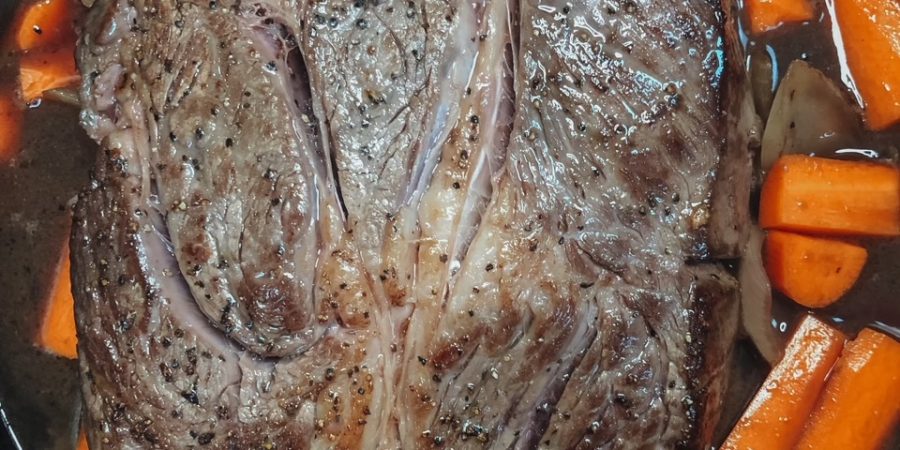
For too often, we have passed up a nice looking, inexpensive piece of meat because we were afraid to take the challenge. What kind of meat, you ask? Some examples are Rump Roasts, Chuck Roasts, Pork Loins and even Lamb Shanks. There are others.
What is the challenge? To make them delicious, tender, and NOT DRY! These cuts of meat are less expensive because they are typically more difficult to cook to perfection – therefore, not in high demand. People just aren’t willing to pay top dollar for a piece of meat that they may or may not know how to cook well. So, learning the method of Braising will be easy on your wallet and even easier on your masseter (that’s one of your jaw muscles that helps you chew.).
Lets rewind to the Cousin Carl days
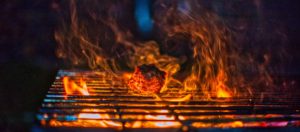
Early in my grilling days, I was looking for quantity over quality. Yes – I was in my 20’s. Money was tight and I was hungry. As I strolled down the meat aisle of my local grocery store, I was looking for a bargain. I came across a nice looking Chuck Roast. To me, it looked more like a really thick, well marbled steak. I had no idea what I was looking at. This piece of meat was cheaper and larger than any other steak in the case. I was sold! I couldn’t wait to toss that thing on a hot grill. What a bargain. What a genius!
I had no idea what I was doing. The perfect grill marks didn’t help. It was tough, dry, and – well, let’s just say it didn’t come close to meeting my expectations. It was bad. Many years passed before I gave the Chuck Roast another chance. Then I learned the secret; Be Brave to Braise!
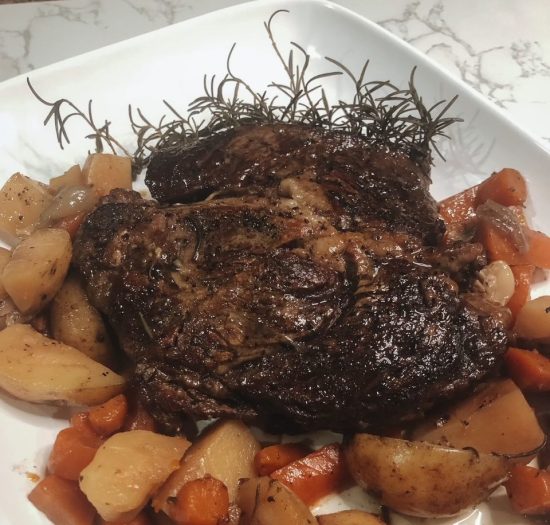
I'm sorry..."Braise"??
As fancy as braising sounds, its actually quite simple. Braising is a one pot production in which you sear a big piece of meat then let it slow cook in added liquid. It can be done entirely on the stovetop or a combination of the stove and the oven.
Pro tip: The best vessel, in my humble opinion, for braising is a Dutch oven, preferably one that is ceramic coated. They’re pretty expensive, but definitely worth it.
Easy enough, let's braise!
Place the pot over high heat while you prepare the meat. I like to first rub a nice olive oil on the meat, then season generously with salt and pepper. Coarse kosher salt and fresh ground black pepper is my preference. Don’t use Extra Virgin Olive Oil (EVOO) for this. It may smoke you out of the kitchen when it hits the pot. EVOO has its place in the fine art of Outlaw Barbeque, just not here.
Place the meat in your now heated pot and get all the sides nicely browned. Then remove the meat for now and add your desired vegetables into the pot along with a cup of your chosen liquid. This is to sauté the vegetables and to remove those caramelized bits of deliciousness that are stuck to the bottom of the pot. Don’t be shy, scrape them off the bottom. They are 100% flavor. Scrape, scrape, scrape!
I like where this is going..
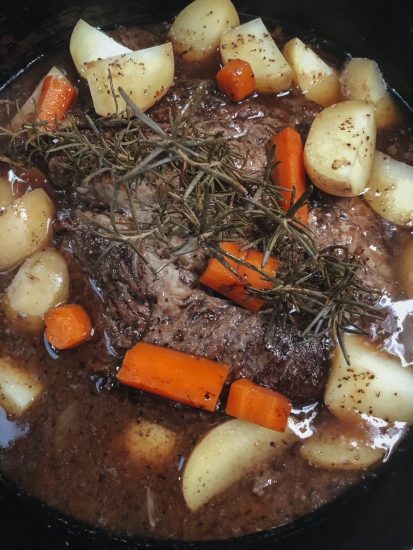
Now it’s time to replace the meat into the pot and add the rest of your liquid. You have many options when it comes to the liquid, such as broth, wine, beer, or even coconut milk. And now the aromatics. Aromatics are your spices, herbs, root and stalk vegetables (carrots, celery, onions, garlic, bay leaves, etc.). There are a lot of recipes out there or just be creative to your own preferences.
Now cover the pot with a lid and either set the stovetop to simmer or place the covered pot in the oven at 325 (F), making sure your pot is oven safe. Now, low and slow wins the race. In about 2 to 3 hours, the meat should be fork tender and your bravely braised meat is ready to be the star of your meal.
Temperature is KEY
I cannot stress this enough, get yourself a quality meat thermometer! A few degrees makes a big difference and the less expensive models can be off as much as 5 to 10 degrees. Why spend good money on a quality cut of meat only to trust the outcome to a $15 – $20 thermometer? It just doesn’t make sense.
One of my favorites is the Inkbird WiFi Meat Thermometer. They’re a high quality, well built, RELIABLE thermometers. These thermometers have 4 probes, which sounds like a lot, but trust me – they are an absolute game changer. I’m a huge fan of the multi-probe models because it allows you to monitor different pieces of meat, any other dishes (smoked mac & cheese…stay tuned), but arguably the most important part – the internal temperature of the smoker.
Too many people trust the cheap thermometers attached to the grill or smoker. While they may work well for a few months, you’d be amazed at how quickly they become VERY inaccurate. Do you really want to trust the outcomes of hundreds of dollars of carnivorous delight to a cheap $20 thermometer? Or even worse, your reputation as a grill master? The king of the smoker? I hope not. I certainly don’t. Get yourself the Inkbird, or any similar, high-quality thermometers. I’m telling you – game changer..
Patience, patience, patience!
This next step makes the difference between pulled pork that literally pulls apart in your hands (get good gloves) and chopped pork bbq – and that is time. From 170 to 190 degrees, the collagen in the meat is breaking down, creating a gelatin that is juicy and now unable to hold those muscle fibers together.
However, this doesn’t happen instantly. So, after you’ve taken the meat off your heat source, keep it wrapped in foil and then wrap that tightly with plastic wrap. This ensures the moisture doesn’t escape. Now place this bbq bundle in a small, well insulated cooler, and fill any void with towels (this is super insulating). Leave the meat in the cooler for at least 2 to 3 hours – DON’T OPEN IT!
Amazingly, even after 3 hours, your pulled pork will be piping hot. You may still need gloves to handle. Now you can un-wrap it, shred it, and serve. You can buy “Bear Claws” that work great for shredding the pork. They’re not a gimmick – I’d tell you. They work. Make sure the outside bark is mixed throughout. Mix in any juices that you’ve saved. Nothing but flavor!
"Dinner time!"
Now you’re ready to serve. Break out your favorite sauces, buns, and sides – especially the cole slaw. I’ve added that recipe as well. DON’T FORGET THE COLE SLAW! You’ll be the star of your gathering – well, second only to the delicious Pulled Pork Barbecue!
Until next time -
Uncle Carl
About Uncle Carl
For 30+ years, Uncle Carl has relied heavily on the ‘trial and error’ method to perfect his approach to barbecue. He’s here to save you from the ‘error’ and smoke to impress.

