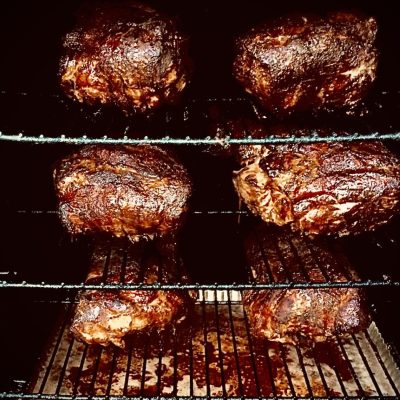
Today I’m going to take you on a journey that literally launched my desire to make smoked meat a part of my life. Why? Because beyond the final product, which is delicious, juicy, tender, smoky, and needs no additional sauce – the process is straightforward, not complicated, and very forgiving. Today, we’re making the beloved pulled pork. However, there are critical elements must be understood: Meat, Seasoning, Smoke, Temperature, and Time
But first - a little background
Pulled pork is what launched my desire to live the life of smoking meat or whatever else I could think of to put in my smoker. Just wait until we talk about smoked Mac-n-Cheese one day. But this isn’t where I started. My first days of smoking, right out of the chute, I decided to do brisket. The quintessential, classic smoke meat, right?
Well, it crushed my ego. I tried it a few times with poor results: delicious but chewy. So there I was – ready to give up, but then I remembered – I don’t give up. I eventually figured out brisket, which I will share one day. However, this was after I learned some very important lessons from my adventures with pulled pork.
What I learned from the smoked pulled pork helped me with ribs and the elusive tender brisket! That’s my story – now lets get to it.

Let's get started!
The first step is buying the correct piece of pork. The Boston Butt! Otherwise known as pork shoulder, yet often misunderstood. Let me clear things up with a brief lesson in Swine Anatomy and a touch of history.
The shoulder of the pig is considered to be from just above the knee joint to the neck. Below the shoulder joint is known as the Picnic Ham and above the joint is known as the Butt. Why “Butt?” If you were to look at the entire pork shoulder, from the knee to the neck, the upper, larger section is known as the butt end, not unlike the butt end of a shotgun or the end of a cigar.
Why Boston? In the 1800’s it was common for specialized butchers across the country to name their specific, tailored cuts of meat after the city where they lived. So yes, this particular cut of pork originated in Boston, and the name stuck. Guess where St. Louis Style Ribs came from. Today, pork shoulder and Boston Butt are essentially the same thing. So why this cut for the perfect pulled pork? Because the fat to meat ratio is perfect for that tender, juicy pulled pork sandwich! So go out and get one.
Okay, I've got the pork - now what?!
Now we need to get this piece some flavor with seasoning. I don’t usually marinate my pork shoulder before smoking. Feel free if you’d like, I’m just looking for the rich flavor of smoky pork shoulder. However, I do rub a generous amount of spices over the pork shoulder a couple hours before it goes in the smoker. I’ve never noticed a substantial difference applying the rub the night before. I have included a nice pork rub recipe at the end, I highly recommend it.
However, if you don’t have all of those ingredients and don’t want to add more clutter to your spice cabinet, a generic pork rub from any grocery store will do. With that being said, next time you’re looking to buy a rub, look at the ingredients. Sugar is almost always at the top of the list. Why would you pay “spice prices” for sugar? Don’t! I mix equal parts of the pork rub and brown sugar. It’s an inexpensive method and I’ve never been disappointed.
Let's smoke it!
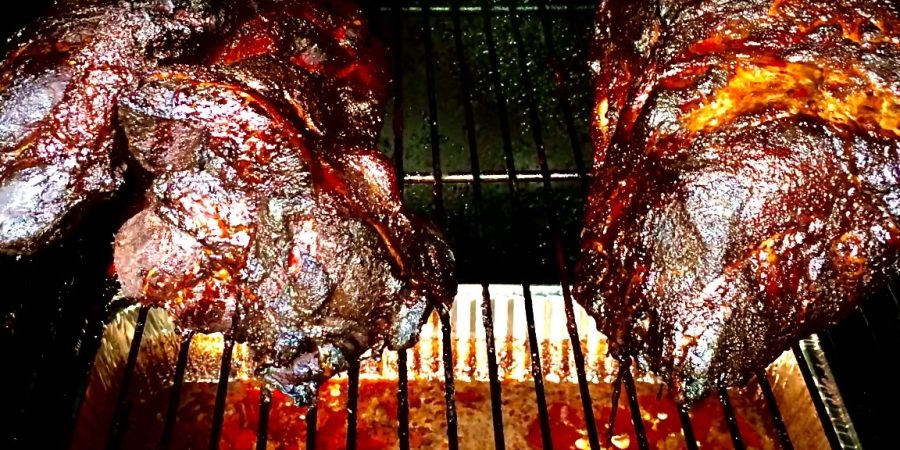
Don’t dry it out! Although the goal is to get the meat temperature to 190 degrees, you don’t have to leave it in the smoker until them. Once the outside has a nice, dark, rich mahogany color, wrap the meat in foil and get it into a 350 degree oven. You could try to get the smoker that hot, but why? The meat is probably somewhere around 170 degrees now. At 170, the meat hits what we call the “Stall.” At 225 degrees, it can take a long time to get the meat temperature to 190, risking the change for the meat to dry out. Wrapped in foil in a 350 degree oven will keep the juices in and get you to 190 in about an hour, give or take. Once the meat temperature hit 190, take it off the heat!
Temperature is KEY
I cannot stress this enough, get yourself a quality meat thermometer! A few degrees makes a big difference and the less expensive models can be off as much as 5 to 10 degrees. Why spend good money on a quality cut of meat only to trust the outcome to a $15 – $20 thermometer? It just doesn’t make sense.
One of my favorites is the Inkbird WiFi Meat Thermometer. They’re a high quality, well built, RELIABLE thermometers. These thermometers have 4 probes, which sounds like a lot, but trust me – they are an absolute game changer. I’m a huge fan of the multi-probe models because it allows you to monitor different pieces of meat, any other dishes (smoked mac & cheese…stay tuned), but arguably the most important part – the internal temperature of the smoker.
Too many people trust the cheap thermometers attached to the grill or smoker. While they may work well for a few months, you’d be amazed at how quickly they become VERY inaccurate. Do you really want to trust the outcomes of hundreds of dollars of carnivorous delight to a cheap $20 thermometer? Or even worse, your reputation as a grill master? The king of the smoker? I hope not. I certainly don’t. Get yourself the Inkbird, or any similar, high-quality thermometers. I’m telling you – game changer..
Patience, patience, patience!
This next step makes the difference between pulled pork that literally pulls apart in your hands (get good gloves) and chopped pork bbq – and that is time. From 170 to 190 degrees, the collagen in the meat is breaking down, creating a gelatin that is juicy and now unable to hold those muscle fibers together.
However, this doesn’t happen instantly. So, after you’ve taken the meat off your heat source, keep it wrapped in foil and then wrap that tightly with plastic wrap. This ensures the moisture doesn’t escape. Now place this bbq bundle in a small, well insulated cooler, and fill any void with towels (this is super insulating). Leave the meat in the cooler for at least 2 to 3 hours – DON’T OPEN IT!
Amazingly, even after 3 hours, your pulled pork will be piping hot. You may still need gloves to handle. Now you can un-wrap it, shred it, and serve. You can buy “Bear Claws” that work great for shredding the pork. They’re not a gimmick – I’d tell you. They work. Make sure the outside bark is mixed throughout. Mix in any juices that you’ve saved. Nothing but flavor!
"Dinner time!"
Now you’re ready to serve. Break out your favorite sauces, buns, and sides – especially the cole slaw. I’ve added that recipe as well. DON’T FORGET THE COLE SLAW! You’ll be the star of your gathering – well, second only to the delicious Pulled Pork Barbecue!
Until next time -
Uncle Carl
About Uncle Carl

For 30+ years, Uncle Carl has relied heavily on the ‘trial and error’ method to perfect his approach to barbecue. He’s here to save you from the ‘error’ and smoke to impress.


